Blog

  • Intro to Time Attack Racing

    Intro to Time Attack Racing

    Intro to Time Attack Racing

    Time attack racing is a thrilling motorsport discipline that focuses on achieving the fastest lap times on a track. Unlike traditional racing, where multiple competitors vie for position, time attack emphasizes individual performance against the clock. This format places a premium on precision, consistency, and strategic planning, making it essential for drivers to master various techniques and approaches to improve their lap times.

    To excel in time attack racing, drivers must not only possess a strong understanding of their vehicle’s dynamics but also develop a keen sense of the circuit they are tackling. Analyzing each corner, elevation change, and track surface is crucial for optimizing lap times. Furthermore, effective tire management and choosing the right setup for different weather conditions can significantly influence overall performance.

    In this article, we will explore key techniques and strategies that can help drivers refine their skills and enhance their competitiveness in time attack events. From mastering cornering techniques to understanding the importance of data analysis, we will provide insights that cater to both novice and experienced racers seeking to elevate their performance on the track. Prepare to delve into the world of time attack racing and unlock new levels of speed and efficiency.

    Mastering Cornering Techniques for Optimal Speed

    Mastering Cornering Techniques for Optimal Speed

    Effective cornering is essential for achieving maximum speed in time attack racing. Properly executed cornering not only reduces lap times but also enhances overall vehicle control. To master cornering techniques, racers should consider several key principles.

    1. Entry Speed: The speed at which you enter a corner significantly impacts your ability to navigate it. Aim to approach corners with a controlled yet aggressive speed. Excessive speed may lead to loss of traction, while insufficient speed can hinder your ability to set up for the exit. Utilize braking zones effectively to reduce speed before turning in.

    2. Apex Positioning: Finding the apex, or the innermost point of the corner, is critical. The correct apex allows for a smoother exit and minimizes steering angles. A late apex can promote better drive out of the corner but requires careful timing to avoid compromising mid-corner speed.

    3. Trail Braking: This technique involves maintaining slight braking during the initial phase of cornering. By gradually easing off the brakes as you turn in, you transfer weight to the front tires, enhancing grip and allowing for sharper steering. Mastering trail braking can lead to improved cornering speed and stability.

    4. Steering Inputs: Smooth and precise steering inputs are crucial for maintaining balance throughout the corner. Avoid abrupt movements, as they can unsettle the car. Instead, focus on gradual inputs that allow both the front and rear tires to maintain optimal contact with the road surface.

    5. Exit Acceleration: The way you manage acceleration out of a corner directly influences your speed on the straights. Begin to apply throttle early as you reach the apex, ensuring you do not exceed the grip threshold of the rear tires. Smoothly transitioning to full throttle sets the stage for an efficient exit and maximizes straight-line speed.

    6. Vision and Anticipation: Looking ahead is crucial for effective cornering. Focus on the track further down the road rather than directly in front of you. Anticipating the trajectory of the corner allows you to make informed adjustments to your speed and steering, leading to improved overall performance.

    Incorporating these cornering techniques into your racing skill set will significantly improve your lap times. Practice is vital; continually refine your approach to various corner types, and analyze your results to optimize your performance on the track.

    Utilizing Data Analysis for Improved Lap Times

    Data analysis plays a crucial role in enhancing performance in time attack racing. By meticulously gathering and interpreting data from various sources, drivers can identify areas for improvement and devise targeted strategies to lower their lap times.

    One of the primary methods of data collection involves using telemetry systems that monitor vehicle dynamics, such as speed, throttle position, brake pressure, and tire temperatures. These metrics provide a comprehensive overview of a vehicle’s behavior on the track, enabling drivers to see exactly where their performance lags. For instance, analyzing throttle application timing can reveal if a driver is losing speed in certain corners, prompting them to adjust their acceleration technique.

    Another critical aspect of data analysis is sector timing, where lap times are broken down into individual segments. By comparing sector performance on different laps, drivers can pinpoint specific areas where they are consistently slower. This information allows for a focused approach to practice sessions, as drivers can target particular sections of the track that require refinement, rather than making vague overall improvements.

    Utilizing simulation software further enhances data analysis by allowing drivers to model different racing scenarios. They can experiment with variables such as tire compounds, suspension settings, and aerodynamics without the risks associated with on-track testing. This enables drivers to optimize their vehicle setup and strategize race-day decisions based on data-driven insights.

    Moreover, comparing data with competitors can reveal critical gaps in performance. Understanding the superior techniques of faster drivers, such as apex points and braking distances, can offer new perspectives and strategies for one’s own driving style.

    In summary, leveraging data analysis in time attack racing is essential for achieving optimal lap times. By monitoring key performance indicators, analyzing sector times, utilizing simulation software, and studying competitors, drivers can refine their skills and technical setups, leading to improved racing outcomes.

    Choosing the Right Tires and Setup for Track Conditions

    Choosing the Right Tires and Setup for Track Conditions

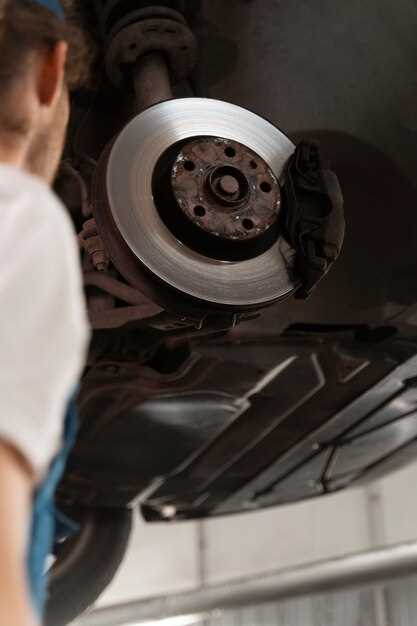
    Selecting the appropriate tires and vehicle setup is critical for maximizing performance in time attack racing. Different track conditions, such as weather, surface type, and temperature, play a significant role in tire selection and suspension adjustments.

    When evaluating tire choices, consider the compound. Softer compounds generally provide better grip at the cost of durability, while harder compounds last longer but may sacrifice traction. In warm, dry conditions, softer tires can offer superior performance; however, in colder or wet conditions, hard tires may be more effective. Additionally, look for tires specifically designed for track use, as they often include features that enhance cornering stability and responsiveness.

    Alongside tire selection, the vehicle’s setup is equally crucial. Adjustments to suspension settings, such as ride height, camber, and toe angle, can significantly influence handling characteristics. A lower ride height can lower the center of gravity, improving cornering agility, while proper camber settings ensure maximum tire contact with the track during turns. Fine-tuning these elements based on specific track characteristics allows drivers to enhance grip and stability.

    Moreover, track temperature affects tire performance. In high temperatures, tires may overheat, leading to a loss of grip. Conversely, in cooler conditions, tires might not reach optimal operating temperatures quickly, resulting in decreased friction. By monitoring track conditions and making real-time adjustments, drivers can maintain peak performance throughout their laps.

    Finally, pre-event testing on the specific track is invaluable. It allows drivers to assess tire performance under actual conditions and make any necessary alterations to both tire choice and vehicle setup before the competition. Gathering data, such as lap times and tire wear, can inform future decisions and strategies, providing a competitive edge.

  • Brake Cooling Techniques for Track Days

    Brake Cooling Techniques for Track Days

    Brake Cooling Techniques for Track Days

    When participating in track day events, efficient braking is crucial for maintaining speed and control. However, the performance of your braking system can be significantly affected by heat buildup. Understanding and implementing effective brake cooling techniques can enhance your vehicle’s performance, reliability, and overall safety on the racetrack.

    Brake components, including calipers, pads, and discs, generate substantial heat during prolonged use. As temperatures rise, brake fade can occur, leading to diminished stopping power and potentially compromising safety. To combat this issue, it is essential to adopt strategies that promote effective heat dissipation throughout the braking system.

    This article will delve into various brake cooling methods, ranging from simple modifications to advanced engineering solutions. By integrating these techniques into your track day preparations, you will ensure that your brakes remain effective under the demanding conditions of high-speed driving, leading to an exhilarating and safe experience on the track.

    Understanding the Impact of Brake Temperature on Performance

    Understanding the Impact of Brake Temperature on Performance

    The performance of a vehicle during track days is significantly influenced by brake temperature. Brakes operate by converting kinetic energy into thermal energy through friction, which generates heat. This heat must be managed effectively to maintain optimal performance and safety.

    High Brake Temperatures: When brake temperatures exceed the ideal range, several adverse effects can occur. One primary issue is brake fade, where the braking system loses effectiveness due to hot brake components. This can lead to longer stopping distances and decreased control, posing risks during high-speed maneuvers.

    In addition to brake fade, excessive heat can lead to uneven wear and damage to brake components such as rotors, pads, and calipers. Overheating can cause brake fluid to vaporize, resulting in a loss of hydraulic pressure and, consequently, brake failure.

    Optimal Temperature Range: Each braking system has a specific temperature range in which it operates efficiently. For most performance brakes, this range lies between 300°F and 1200°F (150°C – 650°C). Operating within this range allows for optimal friction levels and consistent performance without the negative impacts of overheating.

    Cooling Techniques: To maintain brake temperature within the ideal range, various cooling techniques can be employed. These include using ventilated brake systems, air ducts to direct airflow, and high-performance brake pads designed to withstand higher temperatures. Additionally, ensuring the brakes are properly bled and using fluids with higher boiling points can significantly improve heat management.

    Understanding and managing brake temperature is crucial for maximizing track day performance. By keeping brakes within their optimal operating range, drivers can ensure consistent braking response, improved safety, and ultimately better lap times.

    Active vs. Passive Brake Cooling Systems: What You Need to Know

    Active vs. Passive Brake Cooling Systems: What You Need to Know

    Brake cooling is crucial for maintaining optimal performance during track days. Two primary systems exist: active and passive. Understanding their differences is essential for choosing the right solution for your vehicle.

    Passive Brake Cooling Systems rely on natural airflow and heat dissipation. This type typically features larger brake rotor designs, slotted surfaces, and drilled holes that enhance airflow around the brake components. These systems can effectively lower temperatures by allowing heat to escape during braking periods. However, their efficiency is often limited by vehicle speed and ambient conditions. Therefore, during extended high-speed driving or heavy braking, passive systems may struggle to maintain optimal temperatures.

    On the other hand, Active Brake Cooling Systems incorporate mechanical or electronic methods to regulate temperature. These systems may include fans, ducts, or even water sprays to directly cool the brake components. Active systems have the advantage of providing consistent cooling regardless of vehicle speed or braking intensity. This makes them particularly beneficial for high-performance vehicles or settings where braking is frequent and intense. However, they can add complexity and weight to the vehicle, and might require additional maintenance over time.

    When selecting between active and passive systems, consider factors like driving style, vehicle type, and track conditions. For those focused on extended high-performance driving, an active system may offer substantial benefits. In contrast, casual track enthusiasts might find passive systems sufficient for their needs. Ultimately, the choice will impact braking performance, safety, and overall driving experience on the track.

    Practical Tips for Improving Brake Cooling on Track Days

    Effective brake cooling is essential for maintaining performance and safety during track days. Here are practical tips to enhance your brake cooling system:

    1. Upgrade Brake Components: Consider using high-performance brake pads and rotors specifically designed for track use. These often feature materials with better heat dissipation properties, allowing them to withstand higher temperatures without degrading.

    2. Install Brake Ducts: Adding dedicated brake cooling ducts can significantly improve airflow to the brakes. This involves installing channels or hoses that redirect air from the vehicle’s front or side to the calipers, effectively lowering their temperature during high-speed runs.

    3. Optimize Wheel and Tire Selection: Choose lightweight wheels with a design that allows for better airflow around the brake components. Additionally, opt for tires that have a compound suited for track use, as overheating can occur when tires are inadequate for the conditions.

    4. Utilize Cooling Fans: In extreme cases, consider installing aftermarket cooling fans near the brake calipers. These can help enhance airflow and accelerate heat dissipation, especially on circuits with less natural airflow.

    5. Adjust Brake Bias: Adjusting the brake bias can help distribute braking force more evenly between the front and rear axles. This may reduce the load on individual components, assisting in heat management and prolonging brake life.

    6. Monitor Brake Temperature: Use a thermal camera or infrared thermometer to monitor brake temperatures. Knowing specific brake caliper temperatures can help you adjust your driving style or modify your cooling strategy when overheating is detected.

    7. Plan Cooling Strategies During Sessions: Incorporate cooldown laps into your driving strategy. Allowing brakes to cool after heavy use can mitigate heat buildup and extend the life of braking components throughout the track day.

    8. Inspect and Maintain: Regularly inspect your brake system for any signs of wear or damage. Ensure that ducts are unobstructed and that all connections and hoses are in good condition to maintain optimal cooling performance.

    Implementing these tips can significantly improve brake performance and longevity during track days, ensuring that you can enjoy the full potential of your vehicle while maintaining safety and reliability on the track.

  • Setting Up a Home Dyno Room

    Setting Up a Home Dyno Room

    Setting Up a Home Dyno Room

    When it comes to optimizing your vehicle’s performance, having a well-equipped dyno room at home can make a significant difference. A home dyno room allows enthusiasts to conduct detailed tuning and performance analysis in a controlled environment. This guide will walk you through the critical components needed to set up your ideal dyno room, ensuring that you have all the necessary tools and equipment at your fingertips.

    First and foremost, understanding the purpose of your dyno room is essential. Whether you plan to focus on tuning for speed, fuel efficiency, or horsepower, each aspect requires specific equipment tailored to your goals. Choosing the right dynamometer is the first step, as this will be the central piece of your setup. You’ll want to consider the type of engine you’ll be testing and the power levels you aim to achieve.

    Aside from the dynamometer, consider the room itself. Adequate ventilation, space, and electrical setups are crucial for both safety and efficiency. A well-lit workspace will facilitate better visibility during tuning sessions, while appropriate soundproofing can help minimize disturbances and create a focused environment. Finally, integrating software tools for data logging and analysis will elevate your setup, enabling detailed insights into your vehicle’s performance metrics.

    In this guide, we will explore each of these components in detail, providing insights on best practices and recommendations to create a dyno room that not only meets your performance goals but also matches your personal tastes and needs.

    Choosing the Right Location and Space for Your Dyno Room

    Choosing the Right Location and Space for Your Dyno Room

    When setting up your dyno room, selecting the appropriate location and space is crucial for optimizing performance and functionality. The right environment not only enhances the accuracy of measurements but also provides a safe and comfortable working area. Here are key considerations to make the best choice.

    1. Accessibility: Choose a location that is easily accessible for both you and your vehicle. The ideal dyno room should have ample space for moving vehicles in and out without obstruction. Consider proximity to your workshop or garage to minimize transportation time.

    2. Space Requirements: Ensure the space can accommodate the dyno equipment as well as any additional tools or machinery you may need. A minimum clearance around the dyno is essential for maintenance and safety. Aim for at least 10 feet of clearance on all sides, if possible.

    3. Ventilation: Adequate ventilation is vital for a dyno room. High-performance vehicles generate substantial heat and emissions, which can make the space dangerous without proper airflow. Consider installing exhaust fans and ensuring windows, if available, can be opened to facilitate air circulation.

    4. Temperature Control: Maintaining a controlled environment is important for accuracy. Extreme temperatures can affect engine performance and the integrity of measurement data. If possible, choose a space with climate control options or consider insulating the room to regulate temperature more effectively.

    5. Noise Considerations: Dyno testing can be quite loud, which may disturb nearby residents or businesses. Ideally, situate your dyno room in a location that minimizes noise complaints. Soundproofing the room with acoustic panels can further reduce noise levels and create a more pleasant work environment.

    6. Power Supply: Ensure the location has a reliable and sufficient power supply to support the dyno equipment and any additional electrical tools you will use. Check that electrical outlets are conveniently placed and that the wiring meets the dynamometer’s power requirements.

    7. Safety Measures: Safety should always be a priority. Choose a location that allows for easy access to emergency exits and first aid kits. Ensuring fire safety compliance and having a fire extinguisher on hand is also crucial in high-performance environments.

    By carefully considering these factors when choosing the right location and space for your dyno room, you can create a functional, efficient, and safe workspace that enhances your testing and tuning experiences.

    Selecting Essential Equipment and Instruments for Accurate Measurements

    Selecting Essential Equipment and Instruments for Accurate Measurements

    When setting up a home dyno room for performance measurements, the choice of equipment is crucial to ensure accuracy and reliability in your results. Begin with a reliable dynamometer, which is the core instrument for measuring horsepower and torque. Options include engine dynamometers, which measure the performance of the engine alone, and chassis dynamometers, which assess the vehicle’s overall performance including power losses through drive train components.

    Next, consider the data acquisition system. This device collects and analyzes data from various sensors. Look for a system that allows for logging parameters like RPM, throttle position, and air-fuel ratio simultaneously. Ensure compatibility with your dynamometer and the ability to export data for further analysis.

    Sensor selection is equally important for precise measurements. Invest in high-quality sensors for key metrics like pressure, temperature, and airflow. Accurate load cells will provide necessary data on torque, while exhaust gas temperature sensors will help monitor combustion efficiency and engine health.

    Calibration tools are essential for maintaining the accuracy of your equipment. Regularly calibrate sensors and dynamometers according to manufacturer specifications. A good calibration setup will involve both reference standards and a controlled environment to minimize fluctuations in results.

    In addition, consider incorporating a digital display or laptop with software that can visualize data trends in real time. This functionality allows for immediate adjustments to your testing methodology and helps in quick troubleshooting of any issues that may arise during testing.

    Finally, facilitate ongoing maintenance. Regularly inspect and maintain all equipment, following a strict schedule to ensure everything operates within optimal specifications. This proactive approach will sustain the integrity of your measurements over time, making your home dyno room setup both effective and reliable.

    Implementing Proper Safety Measures and Environmental Controls

    Creating an ideal home dyno room requires not only the right equipment but also a strong focus on safety and environmental controls. Ensuring a safe working environment is paramount, as it minimizes the risk of accidents and enhances the efficiency of your setup.

    1. Ventilation: Proper airflow is essential in a dyno room to prevent the accumulation of harmful fumes and ensure a comfortable environment. Install an effective ventilation system that includes exhaust fans and intake vents. Consider utilizing air purifiers equipped with HEPA filters to remove particulates from the air, and if possible, position your dyno room near windows or outdoor ventilation options.

    2. Fire Safety: Equip your dyno room with necessary fire safety measures. Keep a fire extinguisher rated for flammable liquids and electrical fires readily accessible. Regularly inspect all electrical components for wear or damage, and avoid overloading circuits. Implement a strict no-smoking policy inside the premises, and store flammable materials in a secure, designated area.

    3. Personal Protective Equipment (PPE): Always utilize appropriate PPE when working in your dyno room. This includes safety goggles, gloves, and noise-canceling earmuffs. Selecting suitable footwear can also protect against spills and provide support during prolonged standing sessions.

    4. Chemical Handling: If you are using any fuels, oils, or chemicals, ensure they are stored correctly, away from heat sources and in labeled containers. Familiarize yourself with Material Safety Data Sheets (MSDS) for all substances, and take necessary precautions to respond to spills or leaks, including having absorbent materials on hand.

    5. Environmental Controls: Maintaining a consistent temperature and humidity level in your dyno room is crucial for equipment performance and longevity. Use climate control systems like air conditioning and dehumidifiers to achieve stable conditions. Regularly monitor levels with a thermometer and hygrometer to ensure optimal performance.

    6. Emergency Procedures: Establish and communicate clear emergency procedures for your dyno room. Create an evacuation plan, designate assembly points, and conduct regular drills. Ensure all safety equipment, such as first aid kits, are easily accessible and stocked with essential supplies.

    Implementing these safety measures and environmental controls will not only protect the integrity of your equipment and your health but will also contribute to a more effective and enjoyable dyno testing experience.

  • The Best Onboard Cameras for Racing

    The Best Onboard Cameras for Racing

    The Best Onboard Cameras for Racing

    In the exhilarating world of motorsports, where speed and precision reign supreme, having the right camera to document every heartbeat of the race can make all the difference. Racing enthusiasts and professionals alike understand that capturing those split-second moments can create lasting memories and thrilling highlights that resonate with fans and participants. With technology advancing rapidly, there is a plethora of options available, each offering unique features tailored to meet the demands of recording high-octane events.

    From adrenaline-pumping overtakes during a Formula 1 race to breathtaking drifts on a racetrack, the ideal racing camera must combine durability, exceptional image quality, and ease of use. Whether you’re a spectator wishing to capture your favorite driver or a competitor aiming to analyze your performance, selecting the right device will ensure you don’t miss a singular moment. This article delves into some of the top racing cameras available on the market today, highlighting their key features, advantages, and what makes them stand out in the fast-paced realm of racing.

    As we explore these leading choices, we’ll consider factors such as video resolution, frame rates, stabilization capabilities, and durability. In a sport defined by speed, you need a camera that not only keeps pace but also delivers stunning visuals, allowing you to relive the action time and time again. Let’s dive into the top racing cameras that will enable you to seize every thrilling moment and preserve the spirit of the race.

    Choosing the Right Camera Settings for High-Speed Action

    Choosing the Right Camera Settings for High-Speed Action

    Capturing high-speed action, especially in racing, requires a precise combination of camera settings to ensure sharp, dynamic images. Start with the shutter speed; to freeze motion, aim for at least 1/500th of a second. For faster actions, such as vehicles speeding by, consider increasing the shutter speed to 1/1000th or even 1/2000th of a second.

    Next, adjust your aperture to control the depth of field. A wider aperture (e.g., f/2.8 or f/4) will allow more light into the camera, helping maintain fast shutter speeds, while also creating a pleasing background blur. This effect emphasizes the subject, making the racing vehicle stand out against its environment.

    ISO settings are crucial for balancing exposure, especially in varying light conditions encountered on the racetrack. Set the ISO as low as possible to reduce noise but be prepared to increase it if lighting conditions change rapidly. An ISO range of 400 to 1600 is typically effective for outdoor racing during the day.

    Utilize continuous shooting mode to capture a rapid burst of images. This feature allows you to take several shots in quick succession, increasing the chances of getting the perfect moment of action. Pair this with autofocus mode set to continuous (AI Servo for Canon or AF-C for Nikon) to ensure the camera tracks fast-moving subjects accurately.

    Consider using a polarizing filter to reduce glare from reflective surfaces such as car bodies or asphalt, allowing for clearer images. Additionally, keep an eye on the composition; use techniques such as panning to create a sense of motion, which can enhance the overall impact of the photograph.

    Lastly, always consider the environment and lighting conditions. Adjust your white balance according to the settings, whether you are shooting in bright sunlight, cloudy conditions, or under artificial lights. Regular practice with these settings will help you quickly adapt during a race, ensuring you capture the excitement and speed of the moment effectively.

    Best Accessories to Enhance Your Racing Footage

    Best Accessories to Enhance Your Racing Footage

    To capture the high-speed action and adrenaline of racing, having the right accessories can significantly improve the quality of your footage. Here are some of the essential accessories that every racing enthusiast should consider:

    1. Stabilizers and Gimbals

    Utilizing a stabilizer or gimbal ensures that your shots remain smooth and jitter-free, despite the intense motion of racing. These tools counteract shakes and vibrations, allowing for professional-looking videos that maintain clarity through every twist and turn on the track.

    2. External Microphones

    Sound quality is just as important as visuals when it comes to racing footage. Investing in an external microphone can significantly enhance audio capture, providing clear sound from the car’s engine or environmental sounds. Look for directional or lapel microphones to focus on specific sounds, minimizing background noise.

    3. Extra Batteries and Power Banks

    Racing events can be long, and camera batteries may not last throughout the day. Having extra batteries or a portable power bank ensures you won’t miss any action. With multi-battery chargers, you can keep your equipment powered and ready to record at all times.

    4. Lens Filters

    Lens filters, such as polarizing or neutral density filters, can help improve the quality of your racing footage. Polarizing filters reduce glare and reflections, enhancing colors, while ND filters allow for better exposure control in bright conditions, yielding smoother motion blur in fast-moving shots.

    5. Mounting Kits

    Versatile mounting kits enable you to attach your camera securely to various surfaces, such as helmets, cars, or even drones. Different mounts provide unique perspectives, allowing you to capture thrilling angles that keep viewers engaged. Ensure the mounts are compatible with your camera for optimal performance.

    6. Editing Software

    Once you’ve captured your footage, editing is crucial to create a cohesive narrative. High-quality editing software can help you cut, arrange, and enhance your clips, adding effects and transitions that elevate your final product. Look for software that supports high-resolution video formats for the best output quality.

    7. Memory Cards

    High-speed, high-capacity memory cards are essential for recording high-definition footage. Choose cards with fast write speeds to prevent dropped frames during intense action sequences. It’s wise to have multiple cards on hand to ensure you have enough storage for all your recordings.

    By integrating these accessories into your racing footage setup, you can capture every thrilling moment with professionalism and style. Each accessory plays a vital role in enhancing the visual and auditory experience, ensuring that your racing stories are told in the most compelling way possible.

    Comparing Different Camera Models for Optimal Performance

    When it comes to choosing the right camera for racing events, understanding the specifications and features of different models is crucial for achieving optimal performance. Each camera has its unique strengths and weaknesses, making it essential to compare various options before making a purchase.

    One of the primary factors to consider is the camera’s frame rate. Models like the GoPro HERO10 Black offer exceptional high frame rates, allowing you to capture smooth footage at 240 frames per second in 1080p resolution. In contrast, traditional DSLR cameras may provide lower frame rates, making them less suitable for fast-paced environments. For racing enthusiasts, choosing a camera with a higher frame rate can significantly enhance the quality of action shots.

    Another key aspect is the image stabilization technology. Cameras such as the DJI Osmo Action employ advanced electronic image stabilization (EIS) to smooth out footage, particularly when mounted on moving vehicles. In comparison, some mirrorless cameras rely on lens-based stabilization methods, which may not be as effective in high-vibration conditions. This difference can impact the final footage quality, as shaky recordings can detract from the viewing experience.

    Low-light performance is another critical consideration. Racing events often take place at various times of the day, including twilight or nighttime. Cameras like the Sony RX100 VII are renowned for their ability to capture high-quality images in low-light conditions thanks to their larger sensors and faster lenses. In contrast, compact action cameras may struggle in dim environments, leading to grainy or poorly lit images.

    Battery life is also a pivotal aspect when comparing models. Events can last several hours, and some cameras have limited battery capacities. For example, the Insta360 One R features a modular design, allowing users to swap batteries quickly, whereas other compact cameras may require frequent recharging. A longer battery life ensures you won’t miss critical moments during a race.

    Finally, consider the camera’s connectivity features. Modern racing cameras often include Wi-Fi and Bluetooth capabilities for easy sharing and remote control. This feature allows you to adjust settings or start recording from a distance, particularly useful in chaotic racing environments. Models such as the GoPro MAX offer seamless app integration for quick video editing and social media sharing post-race.

    In conclusion, comparing different camera models based on frame rate, stabilization, low-light performance, battery life, and connectivity is vital for selecting the best option for racing photography or videography. Each factor contributes significantly to capturing high-quality moments, ensuring that you never miss a thrilling action shot.

  • Installing a Functional Rear Wing

    Installing a Functional Rear Wing

    Installing a Functional Rear Wing

    Installing a functional rear wing on your vehicle can significantly enhance its aerodynamic performance, providing increased downforce and stability at high speeds. Whether you are a motorsport enthusiast or just looking to improve your car’s handling, this guide will walk you through the essential steps and considerations involved in adding this component to your ride.

    A rear wing is not merely a cosmetic upgrade; it plays a crucial role in improving traction and cornering abilities. Understanding the different types of wings available, as well as how they interact with your vehicle’s design, is key to achieving optimal results. In this guide, we will explore various wing styles, materials, and the adjustments necessary for proper installation.

    In addition to the technical aspects, we will cover the tools and equipment you’ll need, safety precautions to take during the installation process, and tips for fine-tuning the wing for your specific driving conditions. Whether you’re aiming for track performance or just want to improve everyday driving dynamics, this comprehensive guide has you covered.

    Choosing the Right Type of Rear Wing for Your Vehicle Model

    Choosing the Right Type of Rear Wing for Your Vehicle Model

    When selecting a rear wing for your vehicle, it’s essential to consider the specific make and model you own. Each car’s design, weight distribution, and intended purpose will influence the effectiveness of different wing types. For instance, a sports car may benefit from a larger, adjustable wing that can provide significant downforce during high-speed driving, while a compact sedan might be better suited to a subtle lip spoiler that enhances aesthetics without overwhelming the vehicle’s design.

    Understanding the purpose of the rear wing is crucial. If your primary goal is to improve aerodynamics and downforce for racing or aggressive driving, opt for a performance-oriented design. Adjustable wings offer versatility, allowing you to modify the angle for optimal airflow based on driving conditions. On the other hand, if the goal is primarily cosmetic enhancement, a simpler, fixed wing might be appropriate. This can provide a stylish look while still contributing to a minor aerodynamic improvement.

    Material choice also plays a significant role in the wing’s performance and longevity. Common materials include fiberglass, carbon fiber, and aluminum. Carbon fiber, while more expensive, offers a lightweight yet robust option that enhances both performance and aesthetics. Fiberglass tends to be more affordable but may require additional reinforcement, especially for high-pressure applications.

    Ensure that the wing is compatible with the vehicle’s dimensions. An oversized wing on a compact car can lead to poor handling and driver discomfort. Conversely, a small wing on a performance vehicle might not offer the necessary aerodynamic benefits. Research the recommended sizes and designs for your specific vehicle model, and consider consulting with professionals or automotive forums for insights on the best options.

    Finally, compliance with local regulations and laws is imperative. Some regions have strict guidelines regarding aftermarket modifications, including rear wings. Before making a purchase, check the legality to avoid complications during inspections or road usage. Selecting the right rear wing will enhance your vehicle’s performance while ensuring it remains roadworthy and visually appealing.

    Step-by-Step Installation Process for Maximum Stability

    To achieve maximum stability when installing a rear wing on your vehicle, follow these detailed steps carefully. First, gather all necessary tools and materials, including a measuring tape, drill, screws, a level, and the rear wing kit.

    Begin by selecting the optimal location for the rear wing. Measure the width of your vehicle’s rear section and determine the center point. Mark this spot, as it will serve as the reference for mounting the wing.

    Next, hold the rear wing in place at the desired height, ensuring it aligns with the manufacturer’s guidelines. Use a level to confirm that it is straight. Make sure to consider the angle of attack, which is crucial for aerodynamic efficiency.

    Once you are satisfied with the positioning, use a pencil to mark the drilling points on your vehicle’s trunk or hatch. Ensure the marks are accurately aligned with the wing’s mounting brackets. Double-check the placement and alignment before proceeding.

    Using a drill, create holes at the marked points. Be cautious to avoid drilling too deep, as this can damage underlying components. After drilling, clean any debris from the holes to ensure a secure fit.

    Now, attach the mounting brackets of the wing to the drilled holes using the provided screws. Tighten them securely, ensuring the wing is firmly attached to the vehicle. It is essential to check the manufacturer’s torque specifications to avoid over-tightening.

    After securing the brackets, recheck the wing’s level and angle. Make minor adjustments as necessary. Test the stability of the wing by gently pushing on it; it should not wobble or shift.

    Lastly, double-check all screws and connections, ensuring everything is tight and secure. Once completed, you are ready to enjoy the enhanced stability and performance that a properly installed rear wing offers.

    Tuning and Adjusting Your Rear Wing for Optimal Performance

    Tuning and Adjusting Your Rear Wing for Optimal Performance

    To achieve optimal performance from your rear wing, precise tuning and adjustment are essential. Start by considering the angle of attack, which is the angle between the wing and the oncoming airflow. A higher angle increases downforce but can also lead to additional drag. Conversely, a lower angle reduces drag but may compromise downforce. Experiment with different angles to find the best balance depending on your vehicle’s characteristics and your driving style.

    Next, you should evaluate the position of the wing in relation to the vehicle’s body. Positioning the wing too high can create instability, while too low can reduce its effectiveness. Aim for a height that aligns with the center of your rear axle to create the most balanced aerodynamic profile. Also, ensure the wing is mounted securely; any movement can negatively impact its performance.

    Adjust the wing’s endplates if present. Properly shaped endplates help manage airflow around the wing and can significantly enhance downforce. Experimenting with their height and angle can lead to improved performance. Additionally, consider adding a small lip or extension to the endplates to further enhance the airflow management.

    Test your adjustments in various driving conditions. Performance tuning requires real-world evaluation to gauge how changes affect handling, stability, and lap times. Use data logging tools to monitor changes in downforce and drag, allowing you to make informed adjustments during track days or test sessions.

    Finally, consider the impact of your vehicle’s suspension setup. A properly tuned suspension will accommodate the increased downforce generated by the wing. Adjust your spring rates and damping settings to ensure that your setup remains compliant and responsive, maximizing the benefits of your rear wing without causing instability.

  • How to Reduce Brake Fade During Races

    How to Reduce Brake Fade During Races

    How to Reduce Brake Fade During Races

    Brake fade is a critical issue that race car drivers frequently encounter during high-intensity racing conditions. It refers to the reduction in braking power due to overheating of the brake components, which can lead to longer stopping distances and compromised vehicle control. Understanding how to minimize brake fade is essential for maintaining optimal performance and ensuring driver safety on the track.

    One of the primary strategies to combat brake fade involves the selection of high-performance brake materials. Upgrading to carbon-carbon or carbon-ceramic brakes can significantly enhance heat dissipation and reduce the likelihood of fade. These materials are designed to withstand extreme temperatures and provide consistent braking performance even under the most demanding conditions.

    Another effective approach is to enhance the cooling system of the brakes. This can be achieved by implementing air ducts or brake cooling systems that channel cool air directly to the brake components. Properly engineered airflow helps to maintain optimal temperatures, thereby preventing the brakes from overheating during prolonged use. Additionally, regular maintenance and adjustment of brake components are crucial to ensuring that the system operates at peak efficiency.

    Choosing the Right Brake Material for High-Performance Conditions

    Choosing the Right Brake Material for High-Performance Conditions

    The choice of brake material plays a critical role in determining the performance and safety of a racing vehicle. High-performance conditions demand a thorough understanding of different materials and their respective properties. Below are the key considerations for selecting the right brake material:

    • Composite Materials:

      Composite brake pads, often made from a blend of organic materials and metals, offer high friction coefficients and excellent heat dissipation. They are favored for their consistent performance under high temperatures.

    • Ceramic Materials:

      Ceramic brake pads provide superior performance by reducing brake fade and thermal stability. They have a low dust output and longer lifespan, making them ideal for long race events.

    • Metallic Pads:

      Metallic or semi-metallic pads are known for their durability and ability to handle extreme temperatures. They deliver excellent initial bite but may create more noise and dust compared to other materials.

    When selecting brake materials, consider the following factors:

    1. Temperature Range:

      Ensure the material can withstand the specific heat range encountered during a race. High-performance racing often sees brake temperatures exceeding 900°F (480°C).

    2. Friction Properties:

      The ideal brake material should maintain a high friction coefficient throughout its operating temperature. This characteristic ensures reliable stopping power.

    3. Weight:

      Weight impacts overall vehicle performance. Lighter materials can enhance acceleration and handling. Evaluate the balance between strength and weight for optimal results.

    4. Durability:

      A high-performance brake material must endure repeated high-pressure applications without rapid wear. This longevity is essential for maintaining performance over an entire race.

    Ultimately, the right brake material will reflect a compromise between performance, durability, and specific racing requirements. Testing various materials under actual racing conditions helps in making an informed choice that minimizes brake fade and maximizes overall performance.

    Optimizing Brake Cooling Systems for Endurance and Reliability

    Effective brake cooling systems are essential for maintaining performance and reliability in high-stress racing environments. To optimize these systems, several key factors must be addressed to enhance endurance and minimize brake fade.

    First, the design of the brake ducts plays a critical role in cooling. Properly engineered ducts should direct airflow toward the brake components, ensuring that the calipers, rotors, and pads receive adequate cooling. The diameter, shape, and placement of these ducts should be tailored to the specific car model and track conditions to maximize airflow efficiency.

    Another vital aspect is the selection of materials used in brake components. Utilizing lightweight materials with high thermal conductivity can help dissipate heat more effectively. Carbon-carbon and carbon-ceramic composites are popular choices in racing applications due to their superior heat resistance and reduced weight, contributing to overall vehicle performance.

    The use of brake cooling fans can further enhance airflow to the brake components. These fans can be engaged during high-demand situations such as long straights or aggressive cornering, providing an additional cooling boost when it is most needed. Furthermore, integrating temperature sensors can allow for real-time monitoring, enabling drivers and engineers to make data-driven decisions on brake management during races.

    Ventilation holes in brake rotors can also aid in heat dissipation. By allowing air to flow through the rotor structure, these holes help to cool the material more uniformly and reduce the risk of warping or cracking under extreme temperatures. Additionally, rotors designed with curved fins improve the internal airflow and increase cooling efficiency.

    Maintaining proper fluid levels and using high-performance brake fluids that have higher boiling points can prevent vapor lock, which occurs when brake fluid becomes too hot and turns to vapor. Regular checks and replacements of the brake fluid are essential for ensuring optimal performance throughout an endurance race.

    Finally, regular maintenance of the cooling system should not be overlooked. Ensuring that ducts are free from debris, fans are operational, and components are in good condition will contribute greatly to the overall reliability of the braking system. Comprehensive inspections before races can help identify potential issues and prevent costly failures midway through a race.

    Adjusting Driving Techniques to Prevent Overheating and Fade

    Adjusting Driving Techniques to Prevent Overheating and Fade

    Effective driving techniques play a crucial role in minimizing brake fade during racing by reducing the heat generated in the braking system. One of the primary adjustments drivers can make is to focus on smoother inputs. Abrupt braking can lead to excessive heat buildup, so gradually applying the brakes allows for more controlled deceleration and less stress on the brake components.

    Additionally, drivers should practice threshold braking, where the brakes are applied just before the tires reach their maximum grip level. This technique helps in maximizing braking efficiency without overwhelming the system, thereby preventing overheating. Maintaining optimal brake balance is also essential; adjusting brake bias can help in distributing braking forces more evenly between the front and rear wheels, reducing the risk of fade.

    Modulating brake pressure throughout the turn instead of maintaining constant pressure can also mitigate overheating. By utilizing engine braking in conjunction with the brake pedal, drivers can limit the amount of heat generated and transfer loads more evenly across the braking system.

    Furthermore, understanding track dynamics and predicting braking zones can enable drivers to approach corners more efficiently. By setting up for corners early and braking in a straight line, they can decrease the strain on the brakes, minimizing the possibility of fade. Frequent practice and a deep familiarity with the track layout help drivers anticipate when and how hard to brake, optimizing performance while preserving brake integrity.

    Lastly, utilizing downshifts to assist braking can alleviate pressure on the brake system. By engaging lower gears, drivers can take advantage of engine braking, which helps to stabilize the vehicle and prevent excessive brake temperature rise. Combining these techniques allows drivers to refine their skills for both speed and longevity of the braking system, effectively combating brake fade.

  • The Essential Track Day Safety Checklist

    The Essential Track Day Safety Checklist

    The Essential Track Day Safety Checklist

    Participating in a track day is an exhilarating experience that allows drivers to push their vehicles to the limits in a controlled environment. However, the thrill of speed should never overshadow the importance of safety. Whether you’re a seasoned racer or a novice driver looking to improve your skills, adhering to a comprehensive safety checklist is crucial. This guide provides essential safety measures to ensure you and your vehicle are fully prepared for a day on the track.

    Understanding the Risks involved in high-speed racing is the first step toward a safe track day. Unlike regular driving, the track presents unique challenges, including sharp turns, varying surface conditions, and the presence of other high-performance vehicles. Being aware of these factors can help drivers make informed decisions and stay alert throughout the day.

    In this article, we’ll outline a detailed safety checklist that covers everything from vehicle preparation to personal safety gear. By following these guidelines, drivers can not only enhance their enjoyment of the track experience but also contribute to a safer environment for everyone involved. Remember, safety isn’t just about protecting yourself; it’s also about being considerate of fellow drivers and ensuring a fun-filled day for all.

    Pre-Track Vehicle Inspection Steps

    Pre-Track Vehicle Inspection Steps

    Before heading to the track, it is essential to conduct a thorough vehicle inspection to ensure safety and performance. Start by checking the tires; confirm that they are properly inflated and have sufficient tread depth. Look for any signs of wear or damage, such as bulges or punctures, as these can affect traction and handling.

    Next, inspect the brakes. Examine the brake pads and rotors for wear and ensure that the braking system is functioning correctly. Check the brake fluid level and look for any leaks in the system. Proper brake function is crucial for safe stopping at high speeds.

    Review the fluid levels, including engine oil, coolant, and transmission fluid. Make sure all fluids are topped off and free from contamination. Overheating can lead to significant engine damage during track sessions, so adequate coolant levels are critical.

    Ensure that the battery is secure and that all connections are tight. A loose battery can lead to electrical issues during high-performance driving. Additionally, check the belts and hoses for any signs of wear, such as cracks or fraying, as these can lead to mechanical failures on the track.

    Inspect the suspension system, paying attention to shock absorbers and springs. Look for any signs of leakage or damage, as the suspension is crucial for handling. Confirm that all components are securely fastened.

    Review the safety equipment, including the seat belts and harnesses. Check that they are in good condition and properly installed. If your vehicle is equipped with a fire extinguisher, ensure it is easily accessible and properly charged.

    Finally, check all lights and signals to ensure visibility and communication with other drivers on the track. Conduct a final walk-around of the vehicle to confirm everything is in order before heading onto the track.

    Essential Gear and Equipment for Track Days

    Participating in track days requires specific gear and equipment to ensure both safety and optimal performance. The following items are essential for any driver looking to make the most of their time on the track.

    Helmet: A helmet that meets appropriate safety standards, such as DOT or Snell, is crucial. It should fit snugly and provide adequate protection against impacts. Consider a full-face helmet for added coverage.

    Racing Suit: A flame-resistant racing suit is recommended to protect against heat and fire. It should allow for freedom of movement while being lightweight and breathable. Look for suits made from materials that offer both safety and comfort.

    Gloves: Racing gloves improve grip on the steering wheel and protect your hands in the event of an incident. Select gloves designed specifically for motorsport, which offer the right balance of dexterity and safety.

    Shoes: Proper racing shoes provide necessary support and enhance pedal feel. They should be made from fire-resistant materials and fit snugly without being restrictive. Look for shoes with a thin sole to maximize feedback while driving.

    Safety Harness: A multi-point safety harness is essential for keeping you securely in your seat during high-speed maneuvers. Ensure it is properly installed and adjusted to fit your body correctly.

    Roll Cage: If possible, upgrading your car with a roll cage enhances safety during track days by providing structural support in case of rollovers or collisions. Ensure that it follows track regulations and is professionally installed.

    Fire Extinguisher: Having a fire extinguisher within reach is critical for immediate action in case of fire. Ensure it is suitable for automotive use and easily accessible from the driver’s seat.

    Tools and Spare Parts: Carry a basic toolkit and essential spare parts, such as tires, brake pads, and fluids. This preparation can prevent minor issues from sidelining your day at the track.

    Communication Equipment: A two-way radio or pit-to-driver communication system enhances safety by allowing clear communication between the driver and the pit crew, particularly during timed sessions or in emergencies.

    By ensuring you have this essential gear and equipment, you can focus on enjoying the track day while minimizing risks and enhancing your overall experience.

    On-Track Safety Protocols and Procedures

    On-Track Safety Protocols and Procedures

    To ensure a safe and enjoyable experience during track days, drivers must adhere to established safety protocols and procedures. These guidelines help minimize risks and enhance the overall safety for all participants. Below are essential protocols to follow while on the track:

    1. Driver Briefing:
      • Attend the mandatory pre-event driver briefing.
      • Familiarize yourself with the track layout, flag signals, and emergency procedures.
      • Understand the rules regarding passing and racing etiquette.
    2. Personal Safety Gear:
      • Wear an appropriate racing helmet that meets safety standards.
      • Use fire-resistant racing suits, gloves, and shoes.
      • Ensure your safety harness is properly installed and secured.
    3. Vehicle Inspection:
      • Perform a thorough pre-track inspection of your vehicle.
      • Check tires for proper pressure and tread condition.
      • Verify that brakes, fluid levels, and all safety features are functioning correctly.
    4. On-Track Conduct:
      • Maintain a safe distance from other vehicles.
      • Signal intentions clearly when changing lanes or overtaking.
      • Stay aware of your surroundings and anticipate the actions of other drivers.
    5. Flag Signals:
      • Understand the meaning of each flag color and use them appropriately.
      • Respond promptly to flag signals from track officials.
      • Be prepared to yield to yellow flags indicating caution or obstacles on the track.
    6. Emergency Procedures:
      • Know the location of emergency services and the protocol for contacting them.
      • In case of an accident, remain calm and follow the instructions of track officials.
      • If your vehicle experiences issues, move to a safe area and signal for assistance.

    By adhering to these protocols, drivers contribute to a safer environment for themselves and others. Regular communication and vigilance are key components of maintaining on-track safety.

  • Best Wind Tunnel-Tested Body Kits

    Best Wind Tunnel-Tested Body Kits

    Best Wind Tunnel-Tested Body Kits

    When it comes to optimizing vehicle performance, the impact of aerodynamics cannot be overstated. Body kits designed specifically for enhancing airflow, reducing drag, and increasing downforce are essential components for any serious car enthusiast aiming for greater speed and handling. This article delves into the top wind tunnel-tested body kits that have proven their effectiveness in real-world applications.

    Wind tunnel testing provides engineers and designers with crucial insights into how a body kit performs under various conditions. Unlike generic kits that may look good but lack functional benefits, wind tunnel-tested options offer scientifically backed improvements. This ensures that each component, from splitters to spoilers, works synergistically to create a streamlined vehicle.

    In this guide, we will explore several body kits that stand out not only for their aesthetic appeal but also for their performance gains. Each kit has undergone rigorous testing to confirm enhancements in aerodynamics and stability, making them top contenders for those who seek to elevate their driving experience. Join us as we uncover the most effective body kits that merge style with substantive performance enhancements.

    Analyzing Aerodynamic Improvements of Specific Body Kits

    Analyzing Aerodynamic Improvements of Specific Body Kits

    When assessing the aerodynamic efficiency of body kits, one must consider various factors such as drag coefficient, downforce generation, and overall balance. Each body kit is designed with particular goals in mind, and testing in wind tunnels can reveal significant improvements in vehicle dynamics.

    One popular body kit among performance enthusiasts is the GT-R-inspired kit, which often includes enhancements like a front splitter, side skirts, and a rear diffuser. Wind tunnel tests show that such kits can reduce drag by up to 10%. The front splitter increases airflow under the vehicle, thereby promoting a low-pressure area that effectively reduces lift, enhancing stability at high speeds.

    Another notable example is the widebody kit, commonly used in motorsport applications. This kit typically widens the track width, allowing for large wheel and tire setups that can increase grip. Wind tunnel analysis indicates that these kits can improve downforce by up to 30%, particularly at high speeds, providing better cornering capabilities and reducing the chances of lift, which is crucial during aggressive maneuvers.

    Aero spoilers are also instrumental in enhancing vehicle performance. They act by redirecting airflow over the vehicle, increasing the rear downforce without significantly affecting drag. Testing has demonstrated that properly designed spoilers can yield an optimal aerodynamic balance, leading to improved handling and cornering speed, especially in rear-wheel-drive setups.

    Moreover, seamless integration of body kit components plays a critical role. Kits that fit well with the original car design minimize turbulence and maximize airflow efficiency. For example, a well-designed full-body kit can maintain a drag coefficient of around 0.28, showcasing how engineering precision leads to tangible performance benefits.

    In conclusion, wind tunnel testing of body kits provides invaluable insights into their aerodynamic properties. While each kit has unique features, the overall enhancements in drag reduction and downforce generation significantly improve vehicle performance, leading to better handling, stability, and speed on the track.

    Evaluating Material Durability and Weight Reduction in Body Kits

    Evaluating Material Durability and Weight Reduction in Body Kits

    The selection of materials for body kits significantly affects both their durability and weight. Understanding these factors is crucial for performance optimization in automotive design. Common materials used in body kits include fiberglass, polyurethane, carbon fiber, and ABS plastic, each possessing distinct characteristics that influence their overall effectiveness.

    Fiberglass is widely known for its lightweight nature and affordability. It offers decent strength and resistance to environmental factors, but it can be susceptible to cracks under high impact. While fiberglass is often the choice for budget-conscious projects, its durability may not meet the demands of high-performance applications.

    Polyurethane provides a notable advantage with its flexibility and resilience. Unlike fiberglass, polyurethane body kits can absorb impact better without fracturing, making them suitable for both street and track use. Although slightly heavier than fiberglass, polyurethane’s ability to withstand wear and tear contributes to its longevity.

    Carbon fiber stands out as the premium material choice due to its exceptional strength-to-weight ratio. It is significantly lighter than both fiberglass and polyurethane while also boasting remarkable rigidity. However, the high manufacturing costs and risks of damage from impacts limit its accessibility for some enthusiasts. Properly cared for, carbon fiber components can enhance vehicle performance and aesthetics over time.

    ABS plastic serves as a versatile alternative, combining decent impact resistance and moderate weight. It is commonly used in OEM applications and offers ease of manufacturing, which can translate into lower costs. However, ABS may not perform as well as fiberglass or polyurethane in high-stress conditions, particularly at extreme temperatures.

    Weight reduction in body kits is not solely about material choice; design factors also play a significant role. Aerodynamically optimized shapes can enhance downforce and reduce drag, thereby improving performance even further. By carefully evaluating both material durability and design efficiency, manufacturers can create body kits that not only look good but also contribute to overall vehicle performance.

    In conclusion, selecting the right materials for body kits demands a balanced approach between durability and weight reduction. Weighing the pros and cons of each material allows automotive enthusiasts to make informed decisions that align with their performance goals and driving conditions.

    Understanding Installation Procedures and Compatibility with Popular Models

    When considering a body kit for enhancing vehicle performance, understanding the installation procedures and compatibility with popular models is crucial for ensuring optimal results. Here, we provide insights into these aspects to help you make informed decisions.

    Installation Procedures

    Installing a body kit can vary significantly based on the design and complexity of the kit. Here are the general steps involved:

    1. Preparation:
      • Gather all necessary tools, including wrenches, screwdrivers, and adhesive materials.
      • Prepare the work area by ensuring it is clean and organized.
      • Read the instruction manual that comes with the body kit for specific guidance.
    2. Removing Existing Components:
      • Carefully remove stock parts, such as bumpers or side skirts, if necessary.
      • Keep track of all screws and clips as they may be needed for reinstallation.
    3. Fitting the Body Kit:
      • Align the body kit components with the car’s body to check for proper fit.
      • Make adjustments to the kit or car as needed to ensure alignment.
    4. Securing the Kit:
      • Use the provided hardware to secure the components firmly.
      • If adhesive is recommended, apply it carefully following instructions to ensure a strong bond.
    5. Final Inspection:
      • Ensure everything is securely attached and aligns properly.
      • Check for any gaps or misalignments that may affect aerodynamics.

    Compatibility with Popular Models

    Not all body kits are universally compatible. Here are some popular models and key considerations for compatibility:

    • Honda Civic:
      • Various kits exist for different generations; ensure the specific model year is accounted for.
      • Popular for street and racing setups; kits often enhance both aesthetics and performance.
    • Ford Mustang:
      • Body kits typically enhance aggressive styling and improve aerodynamics.
      • Check fitment options for different engine sizes and trim levels.
    • Subaru WRX:
      • Look for kits that complement the car’s all-wheel-drive system and sporty design.
      • Aftermarket options can contribute to downforce and cooling efficiency.
    • Chevrolet Camaro:
      • Compatible with various performance upgrades; check for precise fitment according to the model year.
      • Styling options often focus on both visual impact and improved airflow.

    Understanding these installation procedures and compatibility considerations will help ensure you choose the right body kit for your vehicle, maximizing both performance and aesthetics.

  • Choosing the Right Tire Compound for Racing

    Choosing the Right Tire Compound for Racing

    Choosing the Right Tire Compound for Racing

    The choice of tire compounds is crucial for optimizing racing performance, as it directly impacts grip, handling, and durability on the track. Every racing discipline, fromFormula 1 to endurance racing, relies on specific tire characteristics that cater to unique racing conditions and strategies. Understanding the properties of various tire compounds can give teams a competitive edge, enabling them to adjust their approach according to track conditions and driving styles.

    Tire compounds are typically categorized into three main types: soft, medium, and hard. Each compound exhibits different levels of traction and wear rates, which play a significant role in race strategy. Soft compounds provide enhanced grip and faster lap times but may wear out quickly under high-stress conditions. Conversely, hard compounds last longer but sacrifice some level of grip, making them suitable for endurance races or tracks with less challenging surfaces.

    In addition to the basic categories, environmental factors such as temperature, humidity, and track surface can also influence tire performance. For instance, a tire that performs optimally in hot conditions may not hold the same performance benefits in cooler weather. Consequently, teams must consider not only their car setup but also these variables when selecting the appropriate tire compound. Adapting tire choices to suit real-time track conditions is an essential skill in competitive racing.

    Ultimately, the selection of tire compounds is a dynamic process that requires careful consideration and strategic planning. An informed choice can significantly enhance a racer’s ability to achieve optimal lap times and maintain competitive performance throughout the race. Understanding the nuances of tire compounds can be the difference between victory and defeat in the highly competitive world of racing.

    Understanding the Impact of Tire Softness on Grip

    Understanding the Impact of Tire Softness on Grip

    Tire softness plays a crucial role in the overall grip and performance of a racing vehicle. Softer tires generally provide enhanced traction due to their ability to conform more effectively to the road surface. This conformity enables greater contact area between the tire and the track, allowing for improved friction and grip during acceleration, cornering, and braking.

    When tires are softer, they can generate more heat, which is essential for optimal grip. As the tire warms up, the rubber compounds become more pliable, enhancing the interaction with the track surface. This increased flexibility allows for better performance in various conditions, particularly on asphalt tracks that require high levels of grip for competitive racing.

    However, softer tires also present certain trade-offs. While they may optimize grip, they tend to wear out more quickly than harder compounds. This rapid degradation can lead to decreased performance over the duration of a race, requiring careful management of tire usage. Teams must strategically plan pit stops and tire changes to mitigate the effects of faster wear rates associated with softer compounds.

    The balance between tire softness and durability is essential. Engineers and drivers must assess track conditions, racing strategies, and the specific vehicle dynamics to choose the appropriate tire compound. Analyzing factors such as temperature, humidity, and surface texture allows teams to maximize grip without sacrificing tire life excessively.

    In summary, understanding the impact of tire softness on grip is fundamental for achieving peak racing performance. The right choice of tire compound can provide the competitive edge necessary to succeed on the track, but it requires careful consideration of both grip and longevity to ensure optimal results throughout the race.

    Evaluating Durability vs. Performance in Different Racing Conditions

    When selecting tire compounds for racing, teams must carefully evaluate the balance between durability and performance, as these two factors often contradict each other under varying racing conditions. Each racing surface and environmental factor can drastically impact the behavior of tire compounds, making this evaluation crucial for achieving optimal performance.

    In high-temperature conditions, softer tire compounds tend to deliver superior grip due to their increased flexibility, allowing them to adapt better to the road surface. However, this enhanced grip often comes at the cost of durability, leading to faster degradation. For instance, on a hot, abrasive track, a softer compound may provide outstanding lap times in the early stages of a race but could require more frequent pit stops due to premature wear.

    Conversely, in cooler conditions or on less abrasive surfaces, harder compounds may be preferable. These tires typically offer greater durability, helping to maintain performance over extended stints. However, they may struggle to provide optimal grip immediately, potentially resulting in slower lap times during the initial phases as they require more time to reach their operating temperature.

    Wet or mixed conditions present an additional challenge, as tire compounds must provide grip on slick surfaces while maintaining structural integrity. Intermediate and wet tires are designed to channel water away and enhance traction, but even within these categories, there is a trade-off between durability and speed. Softer wet compounds can excel in grip, but they may wear quickly if the track dries, leading teams to strategically time their tire changes.

    The decision-making process involves analyzing historical data and understanding the specific characteristics of both the track and tire compounds. Teams often use simulation tools and practice sessions to gather insights that inform their choice of tire compounds. Ultimately, the goal is to arrive at a compound that strikes the ideal balance, providing competitive lap times without sacrificing the tire’s lifespan throughout the race.

    In summary, evaluating durability versus performance is a dynamic process that requires a keen understanding of the tire’s characteristics in relation to the specific racing environment. By taking into account temperature, track surface, and weather conditions, teams can select tire compounds that maximize performance while ensuring durability over the distance of the race.

    Choosing the Right Tire Compound for Track Type and Weather

    Choosing the Right Tire Compound for Track Type and Weather

    Selecting the appropriate tire compound is crucial for optimal racing performance, as it significantly impacts grip, durability, and overall handling. The right choice often depends on the specific characteristics of the track and prevailing weather conditions.

    Track Type: Different tracks require different tire compounds due to their surface texture, temperature range, and layout. For instance, high-grip surfaces, like asphalt used in many modern circuits, allow for softer compounds that offer enhanced stickiness and cornering capabilities. Conversely, rough surfaces may necessitate a harder compound to provide durability and reduce tire wear. It’s essential to analyze the layout as well; technical tracks with frequent turns may benefit from softer compounds, while faster circuits with long straights may require a balance between speed and durability.

    Weather Conditions: Weather plays a significant role in tire selection. On warm days, softer compounds can reach optimal operating temperatures quickly, providing maximum grip. However, as temperatures drop, these same compounds may struggle to maintain their performance, leading to diminished traction. In contrast, harder compounds tend to perform better in cooler conditions, maintaining a stable temperature range throughout the race. Rainy weather conditions necessitate specialized wet tires that feature deeper grooves to channel water away from the tire surface, thus minimizing hydroplaning risk.

    Additionally, consider the potential for changing weather conditions during a race. A forecast predicting rain could lead teams to start with intermediate wet tires or softer compounds that give flexibility for quick adjustments. Being prepared for such variables is crucial for maintaining competitive performance.

    Understanding the interplay between track type and weather will enable teams to make informed choices about tire compounds, ultimately optimizing performance and enhancing the chances of success on race day.

  • The Importance of Engine Balancing

    The Importance of Engine Balancing

    The Importance of Engine Balancing

    Engine balancing is a crucial yet often overlooked aspect of automotive engineering that can significantly impact a vehicle’s performance. By ensuring that the internal components of an engine are evenly distributed and function harmoniously, manufacturers can enhance efficiency and reduce wear and tear. When an engine is balanced, it operates more smoothly, transmitting power more effectively to the drivetrain.

    Performance is one of the most significant benefits of engine balancing. A well-balanced engine minimizes vibrations and mechanical stresses, which can lead to improved throttle response and higher RPMs. This optimization allows drivers to unlock the full potential of their vehicle, providing a more exhilarating driving experience. Additionally, a balanced engine can improve fuel efficiency, as less energy is wasted in overcoming unnecessary vibrations.

    Moreover, longevity is another important advantage of a properly balanced engine. Reduced vibrations and stresses lead to less wear on engine components, diminishing the risk of premature failures. This can result in lower maintenance costs and a longer lifespan for the engine. Engine balancing ultimately contributes to a more reliable vehicle, enhancing the owner’s overall satisfaction.

    In summary, engine balancing is a vital process that offers numerous benefits for both performance and longevity. By investing in proper balancing techniques, vehicle owners and manufacturers can ensure their engines operate at peak efficiency, maximizing power and minimizing wear over time.

    Understanding the Impact of Engine Imbalance on Performance

    Understanding the Impact of Engine Imbalance on Performance

    Engine imbalance occurs when the internal forces generated by the engine are not uniformly distributed. This condition can lead to several detrimental effects on performance and longevity. When an engine is imbalanced, it experiences excessive vibrations, which can adversely affect various components and systems.

    Vibrations caused by engine imbalance create stress on engine mounts, leading to premature wear or failure. These vibrations can also disrupt the alignment of accessory components, including the alternator and water pump, potentially causing operational issues or breakdowns.

    Furthermore, an imbalanced engine can result in reduced power output. The uneven distribution of forces may lead to inefficient combustion, as fuel cannot be burned optimally when the engine is vibrating excessively. This inefficiency translates to a decrease in horsepower and torque, adversely affecting acceleration and overall driving experience.

    In addition to performance loss, engine imbalance poses a serious threat to the engine’s longevity. Continuous operation under these conditions can lead to increased wear on moving parts, such as bearings and pistons. Over time, this wear can result in catastrophic engine failure, necessitating costly repairs or complete engine replacement.

    Maintaining proper engine balance is crucial for maximizing performance and ensuring longevity. Regular checks and balancing can help maintain optimal engine function and efficiency, ultimately enhancing both the driving experience and the lifespan of the engine. Understanding and addressing engine imbalance is vital for anyone seeking to optimize their vehicle’s performance and reliability.

    How Balanced Engines Contribute to Component Lifespan

    A well-balanced engine plays a critical role in enhancing the longevity of its components. The reduction of vibrations and uneven forces leads to several key benefits that positively impact the overall durability of the engine. Here are the main ways in which balanced engines contribute to component lifespan:

    • Reduced Vibration:

      Balanced engines minimize vibrations that can cause wear and tear on engine components. Excessive vibrations can lead to:

      • Cracking of engine mounts
      • Premature failure of gaskets
      • Loosening of fasteners
    • Improved Stress Distribution:

      A balanced engine ensures even distribution of forces across components. This balanced load leads to:

      • Less concentration on specific areas
      • Decreased likelihood of component fatigue
      • Increased performance consistency
    • Enhanced Oil Distribution:

      Properly balanced engines promote efficient oil flow throughout the system. Benefits include:

      • Improved lubrication of moving parts
      • Reduced operating temperatures
      • Lower chance of oil starvation
    • Less Engine Noise:

      By reducing vibrations, balanced engines typically produce lower noise levels. This contributes to:

      • A more pleasant driving experience
      • Decreased auditory strain on components
      • Longer lifespan of sound-sensitive components

    In conclusion, the benefits of engine balancing extend beyond performance, significantly influencing the lifespan of various engine components. Enhanced vibration control, stress distribution, oil management, and noise reduction all contribute to a more durable and reliable engine, ultimately leading to fewer repairs and a longer service life.

    Steps to Achieve Optimal Engine Balance for Your Vehicle

    Steps to Achieve Optimal Engine Balance for Your Vehicle

    Achieving optimal engine balance is crucial for enhancing the performance and longevity of your vehicle. Here are the essential steps to follow:

    1. Conduct a Comprehensive Engine Inspection: Begin by thoroughly inspecting the engine components, including the crankshaft, pistons, and connecting rods. Look for any signs of wear or damage that could impact balance.

    2. Weigh Engine Components: Accurately weighing each moving component is vital. This helps in identifying discrepancies in weight that can lead to imbalance. Document the weights for reference during the balancing process.

    3. Machine Work on Rotating Assemblies: If discrepancies are found, consider precision machining on the crankshaft, pistons, or connecting rods. This can involve lightening or adding material to ensure all components have similar weights.

    4. Use High-Quality Components: Opt for high-performance components that are designed with balance in mind. Lightweight, balanced parts contribute significantly to overall engine balance and performance stability.

    5. Implement Proper Assembly Techniques: During the reassembly of the engine, ensure that each part is installed correctly and tightened to the manufacturer’s specifications. Misalignment during assembly can lead to imbalance.

    6. Conduct Dynamic Balancing: Utilize a dynamic balancing machine to test the rotating assembly. This process allows for the identification of unbalanced forces as the engine operates. Adjustments can then be made by adding or removing weight as necessary.

    7. Regular Maintenance Checks: Implement a routine maintenance schedule that includes balance checks as part of an extensive engine health assessment. Regular checks will help prevent imbalances from developing over time.

    8. Monitor Engine Performance: Keep an eye on engine performance metrics such as vibrations and noise levels. Any anomalies may indicate an imbalance that needs to be addressed, ensuring long-term performance and reliability.

    Follow these steps diligently to achieve optimal engine balance, leading to improved performance and enhanced engine longevity.