How to Wire an Auxiliary Switch Panel
- George Harris
- 0
- Posted on

When it comes to enhancing the functionality of your vehicle, installing an auxiliary switch panel can be a game-changer. This panel allows you to control various aftermarket accessories, such as lighting, winches, and other electrical devices, from a centralized location. Understanding how to properly wire this panel is crucial for both performance and safety.
A well-designed auxiliary switch panel not only simplifies operations but also contributes to a cleaner, more organized vehicle interior. With the growing popularity of off-road adventures and vehicle customization, knowing how to install and wire an auxiliary switch panel becomes an essential skill for enthusiasts and everyday users alike.
This guide will walk you through every step of the wiring process, providing detailed instructions and essential safety tips. Whether you’re a seasoned mechanic or a novice DIYer, our comprehensive instructions will ensure that your auxiliary switch panel is wired correctly and functions flawlessly. Let’s get started on transforming your vehicle into a more versatile and efficient machine.
Understanding the Components Needed for Your Auxiliary Switch Panel
When setting up an auxiliary switch panel for your vehicle, comprehending the components required is essential for a successful installation. The primary elements include the switch panel itself, wiring, fuses, and connectors.
The switch panel serves as the control center for various auxiliary components, such as lights, pumps, or other electronics. It typically features multiple switches, allowing easy activation and deactivation of these devices. Select a panel that fits your vehicle’s available space and meets your power requirements.
Wiring is another crucial element. High-quality, durable wires are necessary to handle the electrical load safely. Choose the appropriate gauge wire based on the total amperage of the devices you plan to connect, ensuring it can carry the current without overheating. Additionally, consider using color-coded wires for easy identification during installation.
Fuses protect your electrical system from short circuits and overloads. Using the correct fuse rating for each device is vital to prevent damage. The fuse should be rated slightly higher than the device’s maximum amperage under normal operation. Install a fuse block near the battery for convenience and safety.
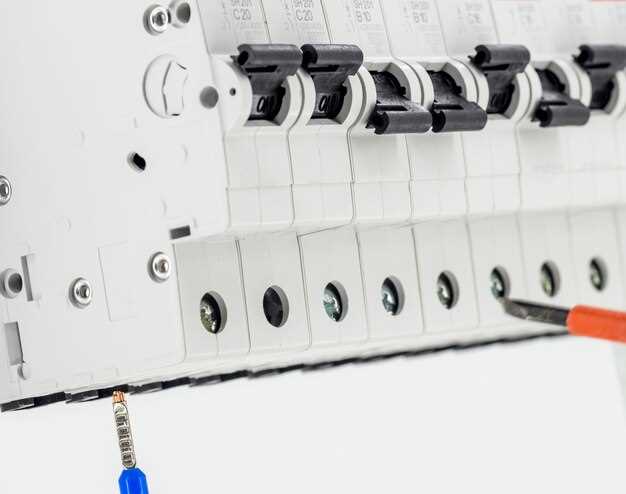
Connectors provide the necessary links between your wiring, the switch panel, and the devices. Quality connectors ensure secure connections that can withstand vibrations and environmental factors. Terminal connectors, spade connectors, or bullet connectors are common choices depending on your wiring setup.
Additional items that may be useful include relays, which manage larger loads without drawing excessive power through the switch, and mounting hardware to securely install the switch panel. A wiring diagram tailored to your vehicle can also streamline the process and reduce errors during installation.
Carefully considering each of these components will result in a reliable and efficient auxiliary switch panel, enhancing your vehicle’s functionality and ensuring safe operation of all connected devices.
Step-by-Step Wiring Process for Connecting Your Switch Panel

Wiring an auxiliary switch panel is crucial for controlling additional accessories in your vehicle. Follow these steps to ensure a successful installation.
- Gather Your Materials:
- Auxiliary switch panel
- Wire (appropriate gauge for your accessories)
- Fuse holder and fuses
- Connectors (ring terminals, spade connectors, etc.)
- Wire strippers and crimpers
- Electrical tape
- Screwdriver
- Multimeter (optional for testing)
- Disconnect the Battery:
Before starting, disconnect the negative battery terminal to prevent any electrical shorts or shocks.
- Choose a Location for the Panel:
Find a suitable location within the vehicle for mounting the switch panel. Ensure easy accessibility and visibility.
- Run Power from the Battery:
Using a suitable gauge wire, run a power wire from the positive terminal of the battery to the location of your switch panel.
- Incorporate a fuse holder close to the battery connection to protect the circuit.
- Mount the Switch Panel:
Securely mount the switch panel in your chosen location using screws or adhesive, ensuring it’s firmly attached.
- Connect Ground Wires:
Connect a ground wire from the switch panel to a good chassis ground or directly to the negative battery terminal.
- Wiring the Switches:
Connect the power wire to each switch’s power terminal in the switch panel. Use appropriate connectors for secure connections.
- Check the specifications for each switch to ensure correct input voltage and ratings.
- Connect Accessories:
For each accessory connected to the switch, run dedicated power wires from the corresponding switch terminals.
- Use fuses for each accessory, sized according to the manufacturer’s recommendations.
- Secure All Connections:
Wrap any exposed connections with electrical tape to ensure insulation and prevent shorts. Verify all wiring routes to avoid pinching.
- Reconnect the Battery:
Reconnect the negative terminal of the battery and check that all connections are secure.
- Test the System:
Turn on each switch to ensure that all connected accessories are functioning correctly. Use a multimeter if necessary to troubleshoot any issues.
By following these steps, you’ll have your auxiliary switch panel wired and ready to control various accessories in your vehicle efficiently.
Troubleshooting Common Issues with Your Auxiliary Switch Setup

When setting up an auxiliary switch panel in your vehicle, you may encounter various issues that can impede its functionality. Here are common problems and their solutions.
1. Switch Not Powering On: If the switch panel isn’t receiving power, check the connection to the vehicle’s battery and ensure that the fuse is intact. A blown fuse may prevent power from reaching the panel. Also, verify that the ground connection is secure and tied to a suitable chassis point.
2. Lights or Accessories Not Responding: If the switches operate but the connected accessories do not work, inspect the wiring for any damage. Ensure that the accessory switches are wired correctly according to the manufacturer’s wiring diagram. Additionally, check the voltage at the accessory end to confirm that electrical power is being delivered.
3. Flickering or Dim Lights: Flickering lights may indicate insufficient power supply or poor connections. Check all connections for tightness and ensure that the wires are of the appropriate gauge for the load being used. Replace any corroded connectors and consider upgrading to a larger gauge wire if necessary.
4. Switches Overheating: Overheating can occur if a switch is overloaded. Ensure that the maximum current ratings for the switches are not exceeded. If the setup demands higher amps, consider using relays to handle the load more efficiently. Heat buildup can compromise functionality and safety, so take overheating seriously.
5. Parasitic Drain on Battery: If your vehicle’s battery discharges unexpectedly, it may be due to an unintentional electrical draw from the auxiliary panel. To troubleshoot this, isolate the switch panel by disconnecting it from the battery. Monitor how long the battery holds its charge without the panel connected. If the issue persists, investigate other components in the vehicle.
6. Indicator Lights Malfunctioning: If the indicator lights on the switches do not function correctly, check the bulb installation and wiring connections. Confirm that the indicator lights are installed per the manufacturer’s specifications and replacing any burnt-out bulbs may solve the issue.
By systematically addressing these common issues, you can ensure your auxiliary switch panel functions reliably, enhancing the utility of your vehicle’s electrical system. If problems persist after troubleshooting, consulting a professional may be advisable.
